The San Antonio missions are some of the most photographed places in Texas, and for good reason: weathered limestone, hand-carved facades, arched cloisters, and skies that seem built for drama. But the difference between a snapshot and a photograph you'll actually print usually comes down to three things — the quality of light, the angle you choose, and the hour you show up. This guide walks the mission trail with those three variables in mind, so you can plan a shoot instead of hoping for luck.
The three things that decide your shot
Before we go site by site, a few fundamentals apply everywhere along the trail.
Light
Limestone facades reward side light — the low, raking sun of early morning and late afternoon that rakes across carvings and pulls out every chisel mark and shadow. Harsh midday sun flattens that texture and blows out the pale stone, so treat roughly 11 a.m. to 4 p.m. as your break for interiors, courtyards, and shade. Overcast days are quietly excellent for detail work: soft, even light with no blown highlights.
Angles
Facades read best when you step back and shoot square-on to respect their symmetry, then move in for three-quarter angles that give the towers and domes some depth. Look up for arches and vaulting, look down for worn thresholds and shadow lines, and always scan for framing elements — an archway, a doorway, a tree limb — to lead the eye.
Timing
Golden hour is obvious; the quieter secret is arriving at opening, before tour groups and cars fill the frame. Weekday mornings are your friend. If you're serious about the whole trail in one outing, a guided visit takes the navigation off your plate so you can concentrate on shooting — the Mission Trail Heritage Three and a Half Hour Tour covers multiple sites in a single window, and a Small-Group World Heritage San Antonio Missions Guided Tour keeps the pace flexible enough to linger where the light is working.
Mission by mission
Mission Concepción
The oldest unrestored stone church in the country presents two symmetrical towers and a broad, restrained facade. Because that front faces roughly the same direction the sun tracks across, it takes beautiful warm side light in the late afternoon. Shoot the facade square-on for the classic view, then walk the grounds for a three-quarter angle that separates the towers against sky. Inside, look for the surviving fresco fragments — bring a steady hand or a small tripod for the dim interior, and avoid flash.
Mission San José
The "Queen of the Missions" is the showpiece: a vast walled compound, the famous Rose Window, and an ornately carved front portal. The Rose Window rewards patience — its detail comes alive with soft, angled light rather than direct sun, so an overcast hour or the shadowed part of the day often beats high noon. The compound's arcades and the granary make strong repeating-arch compositions. This is the mission where a wide lens for the courtyard and a longer one for carving details both earn their keep. Because San José draws the most visitors, get there early or stay for the last light.
Mission San Juan Capistrano
San Juan is simpler and more rural in feel — a single bell wall (espadaña) with open arches is the signature image. That bell tower silhouettes beautifully against a bright or sunset sky, so think about backlight and clean skies here. The surrounding grounds and demonstration farm give you foreground and context; a low angle looking up at the bell arches, framed against passing clouds, is the shot people remember.
Mission Espada
The smallest and most intimate of the four, Espada has a distinctive, slightly irregular doorway and a quiet, contemplative mood. It's ideal for soft morning light and tighter compositions — details, textures, the play of shadow in the chapel entry. Don't miss the nearby Espada Aqueduct, one of the oldest still in use; the low arches over water photograph best with directional early or late light skimming the stone.
The Alamo
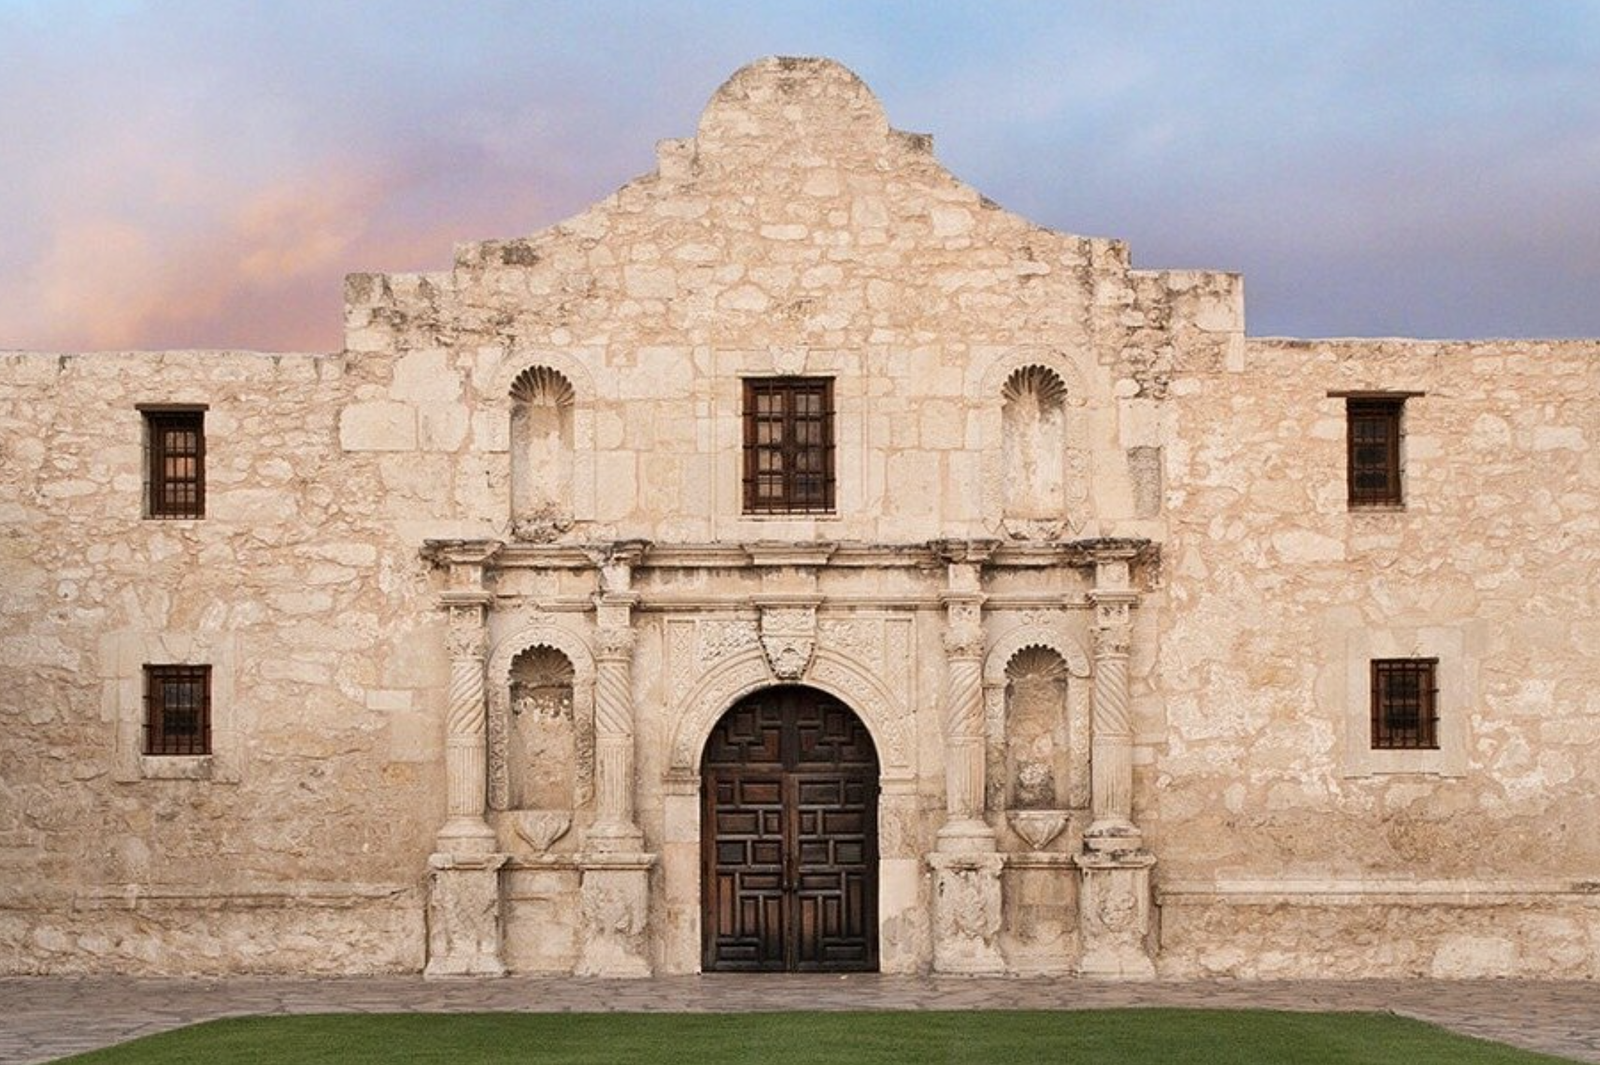
Downtown and endlessly photographed, the Alamo's challenge is crowds and busy surroundings. The famous curved gable facade faces a plaza that fills quickly, so very early morning is the only reliable window for a clean frame. Overcast light suits the pale stone, and a slightly lower angle helps you crop out modern clutter behind you.
Do your homework before you go
Knowing what you're looking at makes for far better photographs — you notice the Rose Window's story, the meaning of a carved saint, the reason a wall bends the way it does, and you compose with intent. A little reading in advance pays off in the field.
- The Spanish Missions of San Antonio by Lewis F. Fischer is a strong visual and architectural primer for spotting the details worth framing.
- San Antonio Missions National Historical Park by Luis Torres gives helpful context on the park sites as a connected trail.
- San Antonio and Its Missions by Joel Daniel Kitchens adds background that deepens how you see each place.
You'll find more reading and field-friendly gear in the Shop, and additional guided options — including the San Antonio UNESCO Premium Missions Tour and another Small-Group World Heritage San Antonio Missions Guided Tour — over on the Tours page if you'd rather have a guide handle logistics while you chase the light.
A simple one-day shooting plan
- Open of day: Start at the Alamo or Concepción for clean, crowd-free frames and soft early light.
- Mid-morning: Move to San José while the sun is still angled; work the Rose Window in shade and the arcades in light.
- Midday: Shift to interiors, courtyards, and the Espada Aqueduct, or simply rest through the harshest light.
- Late afternoon into golden hour: Circle back to Concepción's warm-lit facade and finish at San Juan for a bell-tower silhouette against sunset.
Practical reminders
- These are active places of worship. Be quiet and respectful during services, and never photograph people at prayer.
- Check current hours before you go; the parking-window nature of a visit means daylight is your real deadline.
- Pack water, sun protection, and a lens cloth — the trail is exposed and Texas sun is no joke.
- A small tripod or a steady surface helps enormously with dim interiors; avoid flash on frescoes and carvings.
Photograph the missions the way they were built — patiently, with attention to light and stone — and you'll come home with images that feel like the places themselves, not just proof you were there.